# Development Guidelines on Clock Apps<a name="EN-US_TOPIC_0000001115417926"></a>
## Overview<a name="section11522349121115"></a>
This document describes how to quickly set up a development environment \(using the Hi3516D V300 development board\) and develop a clock app running on OpenHarmony. You can click [here](https://gitee.com/openharmony/applications_app_samples/tree/master/code/Solutions/Tools/JsClock) to obtain the sample code.
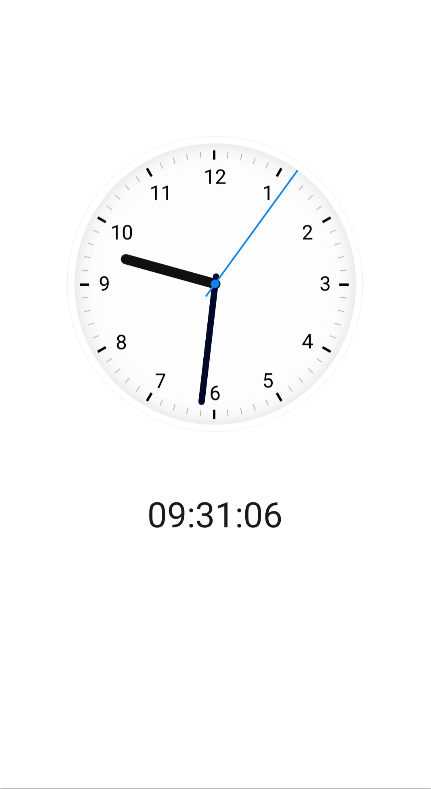
The clock app displays the current time, as shown in the following figure.
**Figure 1** Clock display effect<a name="fig7763172132019"></a>
## Preparations<a name="section6592121861218"></a>
Download and install DevEco Studio. For details, see the [DevEco Studio User Guide](../../application-dev/quick-start/deveco-studio-user-guide-for-openharmony.md).
## How to Develop<a name="section19901741111312"></a>
The clock app displays the current time through a clock face and numbers.
As shown in [Figure 1](#fig7763172132019), the UI consists of two parts:
- Clock face area: displays a dynamic analog clock whose hands rotate accurately.
- Digital time area: displays the current time in numerals.
To build such an app, we can create a page that has a flexible layout with two rows vertically arranged. The development procedure is as follows:
1. Add a root component **<div\>** to the **.hml** file. Note that each **.hml** file can contain only one root component. The sample code is as follows:
```
<div class="container">
</div>
```
**class="container"** indicates the style used by the component. The **container** is a style class defined in the **index.css** file.
```
.container {
flex-direction: column;
justify-content: center;
align-items: center;
width: 100%;
height: 100%;
}
```
The height and width of the root component **<div\>** are set in the style class. Note that the height and width must be explicitly specified \(except for some components, such as **<text\>**\). Otherwise, the component may fail to display. In the **container** style class, the **flex-direction** attribute is set to **column**, which means that child components of **<div\>** are vertically arranged from top to bottom for implementing the flexible page layout.
2. Implement clock hand rotation using the **<stack\>** component. The **<stack\>** component provides a stack container where child components are successively stacked and the latter one overwrites the previous one.
Add a stack container to the root component. The sample code is as follows:
```
<div class="container">
<stack class="stack">
<image src="/common/clock_bg.png" class="clock-bg"></image> <!--Set the clock face image.-->
<image src="/common/hour_hand.png" class="clock-hand"
style="transform : rotate({{ hour * 30 + minute / 2 }}deg);"></image> <!--Set the hour hand image. (hour * 30) indicates that the hour hand rotates 30 degrees every hour. (minute / 2) indicates the rotation degrees per minute.-->
<image src="/common/minute_hand.png" class="clock-hand"
style="transform : rotate({{ minute * 6 + second / 10 }}deg);"></image> <!--Set the minute hand image. (minute * 6) indicates that the minute hand rotates 6 degrees every minute. (second / 10) indicates the rotation degrees per second.-->
<image src="/common/second_hand.png" class="clock-hand"
style="transform : rotate({{ second * 6 }}deg);"></image> <!--Set the second hand image. (second * 6) indicates that the second hand rotates 6 degrees per second.-->
</stack>
</div>
```
**style="transform: rotate\(\{\{ second \* 6 \}\}deg\)** sets the rotation event of a component. **transform** translates, rotates, or scales an image. **rotate** rotates an image. You can set an image to rotate around its x-axis or y-axis.
Set attributes, such as the height, width, and position, of the stack component in the CSS file. The sample code is as follows:
```
.stack {
flex-direction: column;
justify-content: center;
align-items: center;
width: 100%;
height: 50%;
}
```
Set attributes, such as the height and width, of the clock-bg component in the CSS file. The sample code is as follows:
```
.clock-bg {
width: 80%;
height: 80%;
object-fit: scale-down;
}
```
Set attributes, such as the height and width of the hour, minute, and second hands, of the clock-hand component in the CSS file. The sample code is as follows:
```
.clock-hand {
width: 25%;
height: 65%;
object-fit: contain;
}
```
Add a timer in the **index.js** file to update the hour, minute, and second variables in real time so that the time can be automatically updated on the app UI. The sample code is as follows:
```
export default {
timer: undefined,
// Define parameters.
data: {
hour: 0, // Define hours.
minute: 0, // Define minutes.
second: 0 // Define seconds.
},
onInit () {
this.updateTime();
this.timer = setInterval(this.updateTime, 1000)// Set the timer to 1 second.
},
updateTime: function () {
var nowTime = new Date()
this.hour = nowTime.getHours()
this.minute = nowTime.getMinutes()
this.second = nowTime.getSeconds()
if (this.hour < 10) {
this.hour = '0' + this.hour
}
if (this.minute < 10) {
this.minute = '0' + this.minute
}
if (this.second < 10) {
this.second = '0' + this.second
}
},
}
```
3. Display the current time in numerals under the analog clock. Add the text component at the end of the root layout. The following example shows the UI structure:
```
<text class="digit-clock"> {{ hour }}:{{ minute }}:{{ second }}</text>
```
class=**"digit-clock"** sets the height, width, and font size of the component. The sample code is as follows:
```
.digit-clock {
font-size: 58px;
width: 100%;
margin-top: 0px;
text-align: center;
}
```
4. Set the style, animation effect, and dynamic data binding for all components. The complete sample code is as follows:
- **index.hml**
```
<div class="container">
<stack class="stack">
<image src="/common/clock_bg.png" class="clock-bg"></image>
<image src="/common/hour_hand.png" class="clock-hand"
style="transform : rotate({{ hour * 30 + minute / 2 }}deg);"></image>
<image src="/common/minute_hand.png" class="clock-hand"
style="transform : rotate({{ minute * 6 + second / 10 }}deg);"></image>
<image src="/common/second_hand.png" class="clock-hand"
style="transform : rotate({{ second * 6 }}deg);"></image>
</stack>
<text class="digit-clock">{{ hour }}:{{ minute }}:{{ second }}</text>
</div>
```
- **index.css**
```
.container {
flex-direction: column;
justify-content: center;
align-items: center;
width: 100%;
height: 100%;
}
.stack {
flex-direction: column;
justify-content: center;
align-items: center;
width: 100%;
height: 50%;
}
.digit-clock {
font-size: 58px;
width: 100%;
margin-top: 0px;
text-align: center;
}
.clock-bg {
width: 80%;
height: 80%;
object-fit: scale-down;
}
.clock-hand {
width: 25%;
height: 65%;
object-fit: contain;
}
```
- **index.js**
A **.js** file is used to implement logic interactions of the clock app. The following **.js** file implements the function of periodically obtaining the system time.
```
export default {
timer: undefined,
data: {
hour: 0,
minute: 0,
second: 0
},
onInit() {
this.updateTime()
this.timer = setInterval(this.updateTime, 1000)
},
updateTime: function () {
var nowTime = new Date()
this.hour = nowTime.getHours()
this.minute = nowTime.getMinutes()
this.second = nowTime.getSeconds()
if (this.hour < 10) {
this.hour = '0' + this.hour
}
if (this.minute < 10) {
this.minute = '0' + this.minute
}
if (this.second < 10) {
this.second = '0' + this.second
}
},
onDestroy() {
clearInterval(this.timer);
}
}
```
## Signing and Packaging<a name="section10601181101516"></a>
After finishing writing the app code, you need to sign and package the app before running it on a real device. For details, see [Signing and Packaging Guide](https://developer.harmonyos.com/en/docs/documentation/doc-guides/ohos-debugging-and-running-0000001263040487#section17660437768).
## Running on the Real Device<a name="section092721731511"></a>
Before you install the app and run it on the development board, install the DevEco Device Tool by following operations provided in [DevEco Device Tool User Guide](https://device.harmonyos.com/en/docs/ide/user-guides/service_introduction-0000001050166905). Burn OpenHarmony into the development board and run it. For details about how to build, burn, and run an image, see [Getting Started with the Standard System with Hi3516 (IDE Mode)](../quick-start/quickstart-appendix-hi3516-ide.md). After the image is running normally and the system is started properly, perform the following steps to install or uninstall the app:
1. Obtain the HDC client from the following path:
```
developtools/hdc_standard/prebuilt/windows/hdc_std.exe
```
Change the HDC client name to **hdc.exe** and add the path above to the system environment variable **path**.
2. Open the **cmd** window, and run the following commands to push the HAP file to the device directory, and install it:
```
hdc install clock.hap
```
3. Run the following command to start the app. **ohos.samples.clock** indicates the app package name, and **MainAbility** indicates the ability started by the app.
```
hdc shell aa start -d 123 -a ohos.samples.clock.MainAbility -b ohos.samples.clock
```
4. \(Optional\) Run the following command to uninstall the app. **ohos.samples.clock** indicates the app package name.
```
hdc shell bm uninstall -n ohos.samples.clock
```
## FAQs<a name="section1122413460153"></a>
### hdc\_std Fails to Connect to a Device<a name="section1922725151614"></a>
- **Symptom**
**\[Empty\]** is displayed in the output after the **hdc\_std list targets** command is run.
- **Possible Causes and Solutions**
- The device fails to be identified.
Check whether **HDC Device** exists in the universal serial bus device of the device manager. If **HDC Device** does not exist, the device cannot be connected. In this case, remove and then insert the device or burn the latest image for the device.
- hdc\_std works improperly.
Run the **hdc kill** or **hdc start -r** command to kill or restart the HDC service, and then run the **hdc list targets** command to check whether device information is obtained.
- hdc\_std does not match the device.
If the latest image is burnt for the device, hdc\_std must also be of the latest version. As hdc\_std is updated continuously, obtain hdc\_std of the latest version from the **developtools\_hdc\_standard** repository in the **prebuilt** directory.
### hdc\_std Fails to Run<a name="section15657547131615"></a>
- **Symptom**
The **hdc\_std.exe** file does not run after being clicked.
- **Possible Causes and Solutions**
**hdc\_std.exe** requires no installation and can be directly used on a disk. It can also be added to environment variables. Open the **cmd** window and run the **hdc\_std** command to use **hdc\_std.exe**.